How to remove a person from multiple photos
By Remove Your Ex · Updated October 27, 2026
Want it done for you? Try Remove Your Ex →Can I remove the same person from multiple photos at once?
It depends on the album and how much control you need. A free phone eraser may suit a few pictures with an isolated background person. Photoshop suits detailed manual work on individual images. Remove Your Ex lets you prepare up to 10 photos in a browser batch, pick one person in a reference photo, then review proposed matches in the others. Batch photo person removal still needs a decision for each photo; a suggested match isn’t permission to edit it.
Remove Your Ex is a browser tool for anyone with a photo they like and a person in it they don’t: you describe who should go in your own words, and an AI edit gives you the photo back without them.
Sort a mixed album before choosing a batch
Start with a small set you actually want to edit, not every file in the album. Keep the originals separate. Put pictures where the person is absent aside, choose between near-duplicates, and note which images have heavy overlap or very small figures. These need closer review than an unobstructed person in a clear photo.
- Group by the person you want removed. The reference selection is meant to help find that person in other photos, not to choose a different target in every scene automatically.
- Keep batches manageable. Choose up to 10 JPEG, PNG, WebP, AVIF, or HEIC photos, with a maximum of 20 MB each. Larger albums need separate batches.
- Understand the scope. You choose one person per photo. “Multiple photos” does not mean selecting several people for removal from the same image.
Sign in and verify your email before adding photos. Account creation is free, but new accounts start with 0 credits and editing is paid. Choosing local files is not the same as completing an upload or paying for an edit; make sure you have credits for the photos you intend to process.
Pick a reference, then review every proposed match
- Choose the person in one clear photo. In the person-selection mode, tap or click the person who should go. Use a photo where you can confidently tell them apart from everyone else. That choice becomes the reference for suggestions in undecided photos.
- Open the other photos and check the suggestions. Compare the suggested person with the actual image. Don’t assume the same position, outfit, or neighboring person carries across every picture. If there’s no usable suggestion, make the choice yourself.
- Confirm or correct the choice. Use “Confirm” or “Yes, confirm” only when the suggestion is right. Otherwise tap or click the correct person. The app doesn’t turn a suggestion into a selection or start an edit without your action.
- Resolve the whole selection before starting. Each photo needs either a chosen person or a skip decision. Check the number of photos to edit and the credit count, then start the batch. Confirming who to remove and submitting the edits are separate steps.
“Confirm all suggestions” may appear when the remaining suggestions qualify for it. Use it only after inspecting those photos. It accepts the offered matches; it doesn’t replace your review or resolve photos that still have no suggestion. Less certain matches need individual confirmation.
“Not in this photo” and “Skip” do different jobs
A mixed album might contain the right person in eight frames but not the ninth. Don’t select a stand-in just to finish the batch. The controls distinguish an absent person from a bad suggestion:
- “Not in this photo”: excludes that photo from editing in the person-selection workflow. The skipped photo won’t use a credit.
- “Skip” beside a suggested match: dismisses the suggestion only. The photo still needs a decision; choose the correct person or mark that they aren’t in it.
- “Include this photo”: reverses an absent-person skip before submission. Open the skipped photo, use this control, then choose who to remove. Including it doesn’t pick someone automatically.
If the app finds no people in a photo, it says the photo will be skipped. That is a detection outcome, not proof that your target isn’t there. Look at the image yourself before deciding whether it needs a different approach.
If selection doesn’t work, use a smaller described set
“Describe them” is the text fallback. The picker also offers “Can’t find them? Describe them instead”. This switches to one shared description for the selected batch, not a different instruction attached to each photo. “The man in the blue jacket” is useful only if it identifies the intended person in every selected image. “The person on the left” can point at someone else when the group changes positions.
Before switching, remove any absent-person photos from the selection itself. A skip made in the person-selection workflow doesn’t exclude a selected file from a described batch. If clothing or positions vary, split the set into smaller batches or edit those pictures individually rather than writing one ambiguous description for everything. Crowded photos may still require you to tap or click the person; the description option doesn’t bypass that requirement.
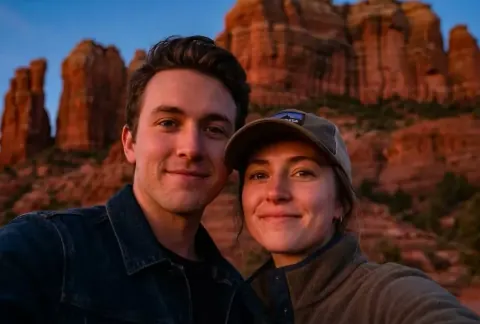
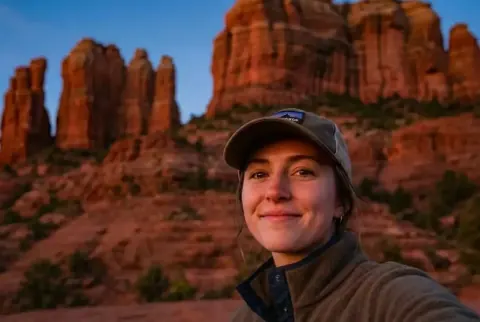 AI-edited
Budget per photo and inspect every result
Each edited photo costs 1 credit, not 1 credit for the whole batch. For example, six photos submitted for editing use six credits; two additional photos marked “Not in this photo” use none in the person-selection workflow. Each photo includes one free second edit. Failed edits return the credit automatically. Current packs are listed on the pricing page.
Review each original beside its own result. A good first photo doesn’t establish that the other nine are right. Check that the intended person is gone, that everyone you wanted to keep remains, and that faces, hands, clothing, shadows, and background lines are acceptable. Overlapping bodies and hidden background details can require reconstruction, and details elsewhere can change too. Edits come back at 1K resolution; they aren’t replacements for your full-resolution originals.
Download the results you want to keep and give the edited copies a separate folder or clear names. Check that each saved result belongs to the right original, especially when several pictures look alike. Don’t discard the originals just because the batch finished processing.
Check privacy before uploading an album
Batch editing uploads photos for server processing; it isn’t an on-device album cleanup. Upload only the images you want processed and have permission to use, rather than unrelated pictures that happened to be nearby in the album.
Your photos are stored privately and deleted automatically after 90 days. Google doesn't use them to train its models under Google Cloud's Vertex AI terms.
You can delete photos sooner from your account. Remove Your Ex is for adults aged 18+ and is unavailable in the EU/EEA, the UK, or Switzerland. See the privacy policy and terms for the processing and service details.
For decisions about which relationship photos to keep, see removing an ex-husband or ex-wife from photos. For choosing images from a trip, see removing an ex from vacation photos.
Get your photos back
Want to try it on your own photo?
Tap the person you want gone and get the photo back without them. One photo is $2.99, and a failed edit returns your credit.
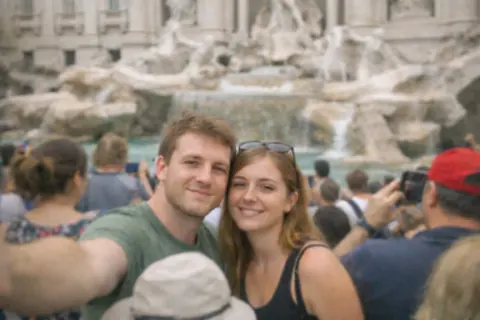
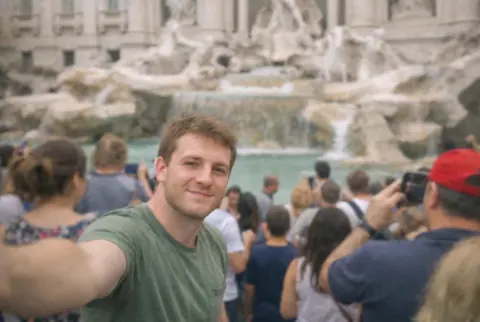 AI-edited
More guides
- How to Remove Your Ex-Husband or Ex-Wife From Photos
- How to Remove Your Ex From Vacation and Trip Photos